This week we are dealing with Object animation, and more specifically the timeline and the Ipo editor, in order to create a bouncing ball animation on screen, which squashes and stretches as it bounces.
Firstly, we needed to undersand the different parts of the timeline.
There isn't many things to be explained about the timeline, mainly just the play button, which starts the animation, and the fast forward/rewind buttons, whcih again are self-explanatory. Frames can be placed in the timeline at any stage, and Alt+A is used to start the animation. Finally the left and right arrow keys are used to move, frame-by-frame through an animation.
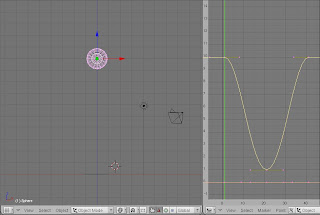
Next step to create an animation, was to have objects to animate. We loaded a basic ball and a plane for the ball to bounce from. We then moved the ball to it's first frame, and created a 'key', lowered it to the ground and then created a second key at frame 20. Finally we selected the 1st key and using shift+d we copied it and doubled it, so we now had an animation that was 40 frame long. The below curve is the path of the ball on the z-axis:
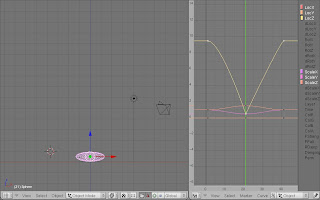
The problem with this curve is that it didn't give a realistic bounce, so the next step was to change this curve. We did this by entering edit mode on the curve, pressing 'v' tochange the curve to vector, then grabbing the curves handles, and repositioning them. Which resulted in the following:

This curve is a lot sharper, and reflects a ball's bounce a lot better. The final step was adding a 'cartoony' bounce to the ball, where it squashed and stretched as it collided with the ground.
This required us to add more keys, more specifically scale keys, so as not to affect the location keys we already had. Once added, we positioned the ball near the ground, squashed it, and added a key position, as you can see below - note the new lines in the animation window:
The final stage involved stretching the ball before it hit the ground and as it recoiled from the ground. We could do this by creating 2 different stretches, however this would take longer, and lead to inconsistencies in the stretch, so we created one stretch, and using shift+d copied it over to the frame right after the ball bounces off the ground.
Here is the final animation, it's basic, but illustrates all that is mentioned:
This takes the same section of Ipo and repeats it over and voer. In the case of the video above, using cyclic extend would allow the ball bounce to be copied again and again.
Cyclic ExtrapolationSimilar to cyclic extend, it does use repetition, however it starts the new repetition, where the last one left off.
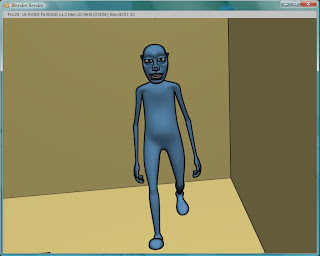
Assignment Update 2At this stage we started laying out the basic scene in Blender (some screenshots are included below). We also decided to use the fully rigged character, called Ludwig, downloaded from
here. Since we are beginners in Blender, making a fully rigged character (with bones and facial expression) proved very difficult - and along with our time constraint, we thought it was best we use a pre made character, and focues on animating. You may also notice, the screenshots have a cartoony look to them. This technique is called 'toon shading', and we used it to give our animation a unique feel, which looks good too.
Screenshots:-
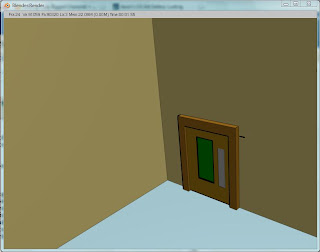
The building we are making, this is the empty (for now!) computer room:
And Ludwig, our character for the animation: